
How to Make and send Metasploit Backdoor [Video]

I was surfing the youtube when i found the following Video which explain is beautifully that how can you infect someone with only Metasploit.
And NOTE:::: In the First step it is not necessary to have Backtrack or Ubuntu. Windows can also work if the Metasploit is installed. Which you can download from here: http://www.metasploit.com/download/[Tutorial] How to set up DarkComet 3[Detail Pics]
STEP 1:
First, go to the official website of Darkcomet, here. And click on "Download", like on this picture.
![[Image: darkcomet1.png]](https://lh3.googleusercontent.com/blogger_img_proxy/AEn0k_sIS_iEWtCL2QzAikKKTLuOKYjirbWr_4AoUk_oDtECgShriYDj8dPnQx9t4x6IbhJBeEAWOzyBI1VWeIfahMQRN89Xes0H5bqTlvktXV9l-KwfCVGFNeCCtA=s0-d)
STEP 2:After clicking "Download", choose the version of DarkComet that you want on the following image, I choose DarkComet FWB 3.2.
![[Image: darkcomet2.png]](https://lh3.googleusercontent.com/blogger_img_proxy/AEn0k_syrK48JKoumPxzeWg_FLgbQqoZhbUMN4jaYMOKwEYdqn9-NOeWVgLFNNeOfN1rFg8lWzxlqAC3z_D-a5fE1T52WJ_gyl_MyXlelvZuDncB4ZZGcZ5xahg=s0-d)
STEP 3:Check all before downloading.
![[Image: darkcomet3.png]](https://lh3.googleusercontent.com/blogger_img_proxy/AEn0k_sF8SQBdP2_O5gPBgHGutXxL-BanzFcPdzhUNosrsFDl8dKhszph5W9IK4fPwodNT0sgvcVyPc5Uw4Z5fOb9wpYDtGbritZbYnuGMIKSxeXPsk_pGOxqA=s0-d)
STEP 4:After starting DarkComet you must accept the "Terms and condition".
![[Image: darkcomet4.png]](https://lh3.googleusercontent.com/blogger_img_proxy/AEn0k_u5Y914cZeU-BMUB0Qmo18gjjhqswqYhA-_DLKXzPF9X9NlEQS17Uc6ZsoJkcOF2f7GiqasHz2WOHxtihvdztInbrdt_q-SWok9qKeLxuRT9x2zT1_hnBCG=s0-d)
STEP 5:Now, let Darkcomet aside for a moment, You need to register No-IP, by clicking here.
After completing your registration form, you must go on "Manage Hosts".
![[Image: darkcomet5.png]](https://lh3.googleusercontent.com/blogger_img_proxy/AEn0k_uDklC86RuNcPiDl1GpqKgmID6BinMwioma2zEYHY8Mtmvpy3JobX6wwZCrbTQwzYCTlLhNT461tpvGnJM8O_teubhWoDUWVCQ9tvj7sd9hkFTqHurPmDCtVA=s0-d)
STEP 6:Now click on "Add a Host".
![[Image: darkcomet6.png]](https://lh3.googleusercontent.com/blogger_img_proxy/AEn0k_sGwp-NezauiGMI9mdUl9BEZ3qcFMaY4R0DmxUMUAnjAjAzMm9ClSRkGBLiweJsaceYxhI_vJzdQ1Y14voULA5Od5fd0lhDWcAHJfpf7KZlRNNyqcQAzdW8=s0-d)
STEP 7:After clicking "Add a Host" you must choose a "Hostname".
![[Image: darkcomet7.png]](https://lh3.googleusercontent.com/blogger_img_proxy/AEn0k_tJn_8PlsQBol-98_UqQiuncokQxaeIaMbkvIbv1BCiZEHCVVF6QVYuKpLCyP_Ew6i8X89FpE-MWjKDyY4dUIbd-7aBeMV-Pg6LdaDh_oXvSpMDd0fPXYcSsg=s0-d)
STEP 8:Now you'll need to download "No-IP Dynamic Update Client v3.0.4" but in first, choose your "Operating System".
![[Image: darkcomet8.png]](https://lh3.googleusercontent.com/blogger_img_proxy/AEn0k_vPz-7fY6jskc5u0PCJuyYN-Opv_jVGHdWlgMumcfVFe6PzGsrQOhvDhTtbppWKc6dPTA8VshI0iJBk0D5IJNUTFdxIhePzNNu_OoZ9ku23EEh8ueHmKhJg=s0-d)
STEP 9:Now that you've chosen your "Operating System"you can download.
![[Image: darkcomet9.png]](https://lh3.googleusercontent.com/blogger_img_proxy/AEn0k_uVVsI-gSxahoHc2w7sWk_S1txb2HbPgCY33Zh7NZD_j5ou80z3KwSDEg9x-h9VSJFSJAVxCG_yny0jtluk0-dgnltLdVc72dALV-FNJpBNsAMsy9zFI9g=s0-d)
STEP 10:Now, you'll need to install No-IP.
![[Image: darkcomet10.png]](https://lh3.googleusercontent.com/blogger_img_proxy/AEn0k_uMf-bgMwTfXVbs4HWmpvSy0c-BBhrUUCle4NgyGdY9q15IP7sUweR9-2XRzBmk94P2_p1cjoAmuCd4yxwMUhFnjK4ssJ5pJUJbIkPjXVRi5Lk039AI2KTpFBk=s0-d)
STEP 11:Now, choose the install location and click on "Next >".
![[Image: darkcomet11.png]](https://lh3.googleusercontent.com/blogger_img_proxy/AEn0k_tQMFRsy7Wt9Ahw1E8G8-I4ytoKA8OZN4Rm1UJirqqyy3L0GzW_kj1AAeBm4LJAmV6UUDmU15T7E7RTMxDctJO9w3CzZKUb9fDbfn8gbdtOTV9wHn6CbnthUM0=s0-d)
STEP 12:Now, choose start menu folder, and click on Install.
![[Image: darkcomet12.png]](https://lh3.googleusercontent.com/blogger_img_proxy/AEn0k_tEzEZFSJ74CqVT8lxOXz9S0nGmWpkmId1iiQnNA33bNWhhJwUzM89A6GLu8G22qiSP7v0ise7i3HxZuM328Z7LGiGBmRL3XHoj02VxpCfUZK4Mq2-Ht6_3=s0-d)
STEP 13:Now you will configure No-Ip, start it and enter your E-mail address & password entered on No-IP.org.
![[Image: darkcomet13.png]](https://lh3.googleusercontent.com/blogger_img_proxy/AEn0k_vpAooGdOiUNZOLR1UiZVeDj1awlP_8IWEdkhGMjPMZTsPpRBRqdxNaW8hTEC8brdMmXxXaKxQLKq5KnMOP1nj6oSDxeYv8G2vM2YKmTd3lutpfXoEVRXK40Fc=s0-d)
STEP 14:Now you must select you Host, check you Host and click on Save.
![[Image: darkcomet14.png]](https://lh3.googleusercontent.com/blogger_img_proxy/AEn0k_vzxiamHSIyS2pRJiTqzW9Zhc6550Lx5504Vqs-I-mqGrDJkPpAzWsJiOoiwoCa4LQ5z6tFoqrNmnwaXX67b9Zy5as7dD5KfvRPdYMYdBflsT1uCKnsWnyDLA=s0-d)
STEP 15:It's OK, you can start up DarkComet 3.2 FWB. Now you must add server socket.
![[Image: darkcomet15.png]](https://lh3.googleusercontent.com/blogger_img_proxy/AEn0k_t5jQUO9vJvphy5D2CsDPQ4TugqQsl0OBubQedwt1pj41WWyULXJG7ymjb5yaCMl-EZwzYzXPeQLtF596vu3Gz1MKvXLiLz2Oj4-ygPWO3jDXBrdgrY9O6Dgrk=s0-d)
STEP 16:Now you edit your server, you will choose the "Server module (634,50 KB)".
After clicking on "Server module (634,50 KB) a window called "Server Editor - Installer version <3.0.2>" will appear.
![[Image: darkcomet16.png]](https://lh3.googleusercontent.com/blogger_img_proxy/AEn0k_v9OuRW3-NRYlnfNLILD-1bJk-TTfF9AAx8gqvpE8sTm59C_WqxBeEfBt7mut_bvsE5XVnGJabERvAJfhrjlHuvlMFx7MK2qjoSe8P4ICBbkEMFe1B5i9SWrA=s0-d)
STEP 17:Now you start to edit the server.
STEP 18:Now, must enter your No-IP and test it, if the message is green, it's OK.
After, you can click on "Build module".
![[Image: darkcomet18.png]](https://lh3.googleusercontent.com/blogger_img_proxy/AEn0k_si5iw3e8tvlBysHMhlOiII7La_bcoyrfRW1n3Ij0ivz9trjXuaWDHYUtrVu0CY0xo8V9s7HCNHPbWF5LEpTmS9wuAj2ry8h0mny4PB5ZU_5LxeraTZ-k2_2g=s0-d)
STEP 19:Now, you can create the server, save it, and open it.
![[Image: darkcomet19.png]](https://lh3.googleusercontent.com/blogger_img_proxy/AEn0k_tO1rgyMLq9YUObXJthIKMegz4iYUdeGpZPhDU5vS0ZGrAbLTX3WFfT_cyZ84234LQxm_CC2uu49_DmL2424fK2DD4DuTUdErnvbg6GBpk4oRSHNz2OmSUQ=s0-d)
STEP 20:By opening your server, if it worked,a message at the bottom right of your screen will appear.
![[Image: darkcomet20.png]](https://lh3.googleusercontent.com/blogger_img_proxy/AEn0k_vp0SBEiSVIGPzpbBEpB56UUqmXMr9B9h6aic9r7pV-ZC43RBorlUKHMW2_Eo_H6FfYQD5sMC-2l6wKN4gY-5NMVow8fOIlo7qtBdnm9ozpcQ2j3Ci0xeLr7Ro=s0-d)
Here is the final result.
![[Image: darkcomet21.png]](https://lh3.googleusercontent.com/blogger_img_proxy/AEn0k_ug8AMXHlUFdvPjMdk4vGXhboGHu6N9uk2z6tt39M9b93q4VMSL-w8wtESCmuVI2CRBxFMNOnX4z-eaRoUbUjVzLIEQrRntUZBnYkZIf0uxI9VaJfza6nsSuFg=s0-d)
Now the server is set up and totally ready.
====================================================================
This article was originally published on :: http://www.hackforums.net/showthread.php?tid=1218482 and written by :: XxHaTeD-RaTeDXx
+++++++++++++++++++++++++++++++++++++++++++++++++++++++++++++++++++++
First, go to the official website of Darkcomet, here. And click on "Download", like on this picture.
![[Image: darkcomet1.png]](http://img851.imageshack.us/i/darkcomet1.png/)
STEP 2:After clicking "Download", choose the version of DarkComet that you want on the following image, I choose DarkComet FWB 3.2.
![[Image: darkcomet2.png]](http://img20.imageshack.us/i/darkcomet2.png/)
STEP 3:Check all before downloading.
![[Image: darkcomet3.png]](http://img33.imageshack.us/i/darkcomet3.png/)
STEP 4:After starting DarkComet you must accept the "Terms and condition".
![[Image: darkcomet4.png]](http://img685.imageshack.us/i/darkcomet4.png/)
STEP 5:Now, let Darkcomet aside for a moment, You need to register No-IP, by clicking here.
After completing your registration form, you must go on "Manage Hosts".
![[Image: darkcomet5.png]](http://img684.imageshack.us/i/darkcomet5.png/)
STEP 6:Now click on "Add a Host".
![[Image: darkcomet6.png]](http://img859.imageshack.us/i/darkcomet6.png/)
STEP 7:After clicking "Add a Host" you must choose a "Hostname".
![[Image: darkcomet7.png]](http://img839.imageshack.us/i/darkcomet7.png/)
STEP 8:Now you'll need to download "No-IP Dynamic Update Client v3.0.4" but in first, choose your "Operating System".
![[Image: darkcomet8.png]](http://img541.imageshack.us/i/darkcomet8.png/)
STEP 9:Now that you've chosen your "Operating System"you can download.
![[Image: darkcomet9.png]](http://img14.imageshack.us/i/darkcomet9.png/)
STEP 10:Now, you'll need to install No-IP.
![[Image: darkcomet10.png]](http://img706.imageshack.us/i/darkcomet10.png/)
STEP 11:Now, choose the install location and click on "Next >".
![[Image: darkcomet11.png]](http://img822.imageshack.us/i/darkcomet11.png/)
STEP 12:Now, choose start menu folder, and click on Install.
![[Image: darkcomet12.png]](http://img64.imageshack.us/i/darkcomet12.png/)
STEP 13:Now you will configure No-Ip, start it and enter your E-mail address & password entered on No-IP.org.
![[Image: darkcomet13.png]](http://img576.imageshack.us/i/darkcomet13.png/)
STEP 14:Now you must select you Host, check you Host and click on Save.
![[Image: darkcomet14.png]](http://img853.imageshack.us/i/darkcomet14.png/)
STEP 15:It's OK, you can start up DarkComet 3.2 FWB. Now you must add server socket.
![[Image: darkcomet15.png]](http://img710.imageshack.us/i/darkcomet15.png/)
STEP 16:Now you edit your server, you will choose the "Server module (634,50 KB)".
After clicking on "Server module (634,50 KB) a window called "Server Editor - Installer version <3.0.2>" will appear.
![[Image: darkcomet16.png]](http://img716.imageshack.us/i/darkcomet16.png/)
STEP 17:Now you start to edit the server.
STEP 18:Now, must enter your No-IP and test it, if the message is green, it's OK.
After, you can click on "Build module".
![[Image: darkcomet18.png]](http://img858.imageshack.us/i/darkcomet18.png/)
STEP 19:Now, you can create the server, save it, and open it.
![[Image: darkcomet19.png]](http://img29.imageshack.us/i/darkcomet19.png/)
STEP 20:By opening your server, if it worked,a message at the bottom right of your screen will appear.
![[Image: darkcomet20.png]](http://img222.imageshack.us/i/darkcomet20.png/)
Here is the final result.
![[Image: darkcomet21.png]](http://img638.imageshack.us/i/darkcomet21.png/)
Now the server is set up and totally ready.
====================================================================
This article was originally published on :: http://www.hackforums.net/showthread.php?tid=1218482 and written by :: XxHaTeD-RaTeDXx
+++++++++++++++++++++++++++++++++++++++++++++++++++++++++++++++++++++
An Introduction To Keyloggers, RATS And Malware

The book takes you right from the beginning from basics to some advanced types of attacks too, In this book I have also reviewed various types of best keyloggers out there so you can find it easier to to choose the best one according to your needs.
How Much Does it cost?
Well here is the best part , unlike my other products such as "A Beginners Guide To Ethical hacking" and "Facebook Hacking Course" i have decided to give this e-book for free, The reason why I am giving this e-book for free is because lots of people cannot afford the costs of my products, so I don't want any one to miss the chance of getting hands on it.My aim is to create awareness among the individual related to Ethical Hacking and Security, This is probably the reason why I am running this blog in the first place. Every day thousands of people fall for these types of attacks and end up loosing their sensitive data such as their usernames and passwords and in the worse case some of them end up loosing their credit card numbers too.
By reading this e-book I am very confident that you will be able to protect your computer from most of these types of attacks.
You can download the book here
BY: Rafay Baloch
0 Crypter FREE FUD to Crypt your Keyloggers
![[Image: screenshotrbv.jpg]](https://lh3.googleusercontent.com/blogger_img_proxy/AEn0k_sdf86F7HznYrgDE8vTycCSHYj0_AvyfC1xLZdXq9ergBkTjuMofBHRVBy1D84rCdDA4_h9uyZE-wr3vp6ovZRqcsUJJtRYOw6v47TsgEzFUM6iN_KWAVhSh_g=s0-d)
[ Description ]
This Crypter Crypt your Keyloggers and RATs and make them undetected from Antivirus.Coded in : VB.Net
Dependencies : Framework 2.0
Works On : Windows XP/Vista/7 (32/64bit)
RunPE : Private Method
Dependencies : Framework 2.0
Works On : Windows XP/Vista/7 (32/64bit)
RunPE : Private Method
Tested & Working With :
- BlackShades
- CyberGate
- DarkComet
- Spy-Net
- Cerberus
- iStealer 6.0
- iStealer 6.3
- .NET Files
Credits :
- Kobac (<3 <3 <3 Hidden Techniques of the Lost Ninjas & RunPE method ^_^ )
- Aeonhack (Awesome Theme)
RESULTS: 0/33
AVG Free OK
ArcaVir OK
Avast 5 OK
Avast OK
AntiVir (Avira) OK
BitDefender OK
VirusBuster Internet Security OK
Clam Antivirus OK
COMODO Internet Security OK
Dr.Web OK
eTrust-Vet OK
F-PROT Antivirus OK
F-Secure Internet Security OK
G Data OK
IKARUS Security OK
Kaspersky Antivirus OK
McAfee OK
MS Security Essentials OK
ESET NOD32 OK
Norman OK
Norton Antivirus OK
Panda Security OK
A-Squared OK
Quick Heal Antivirus OK
Rising Antivirus OK
Solo Antivirus OK
Sophos OK
Trend Micro Internet Security OK
VBA32 Antivirus OK
Vexira Antivirus OK
Webroot Internet Security OK
Zoner AntiVirus OK
AhnLab V3 Internet Security OK
File Name zavrsenposo.exe
File Size: 507904
File MD5: dac6299403506538e107b05a993ba209
File SHA1: 2210fda136ead624eec7b0a93c13beb9e2d141e4
Check Time: 2011-03-21 15:00:37
http://scan4you.net/result.php?id=9e7d7_8dfsb
DOWNLOAD LINK: http://www.mediafire.com/?byuhtdbj4pit8pn
OLD DOWNLOAD LINK :
OLD PASSWORD :
Ardamax Keylogger v3.7.2 full Free Crack
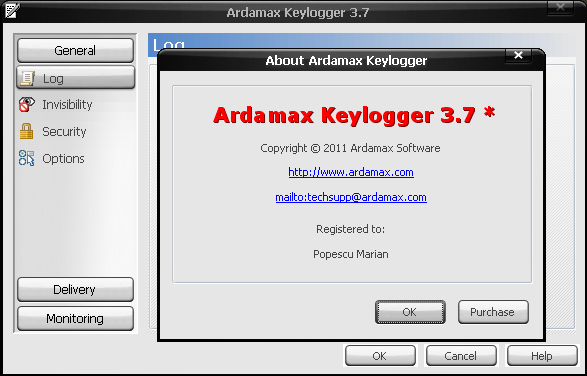
Ardamax Keylogger is a keystroke recorder that captures user's activity and saves it to an encrypted log file. The log file can be viewed with the powerful Log Viewer. Use this tool to find out what is happening on your computer while you are away, maintain a backup of your typed data automatically or use it to monitor your kids. Also you can use it as a monitoring device for detecting unauthorised access. Logs can be automatically sent to your e-mail address, access to the keylogger is password protected. Besides, Ardamax Keylogger logs information about the Internet addresses the user has visited.
This invisible spy application is designed for 2000, XP, 2003, Vista and Windows 7.
Keylogger Features:
* Email log delivery - keylogger can send you recorded logs through e-mail delivery at set times - perfect for remote monitoring!
* FTP delivery - Ardamax Keylogger can upload recorded logs through FTP delivery.
* Network delivery - sends recorded logs through via LAN.
* Clipboard logging - capture all text copied to the Windows Clipboard.
* Invisible mode makes it absolutely invisible to anyone. Ardamax Keylogger is not visible in the task bar, system tray, Windows 2000/XP/2003/Vista/Windows 7 Task Manager, process viewers (Process Explorer, WinTasks etc.), Start Menu and Windows Startup list.
* Visual surveillance - periodically makes screenshots and stores the compressed images to log.
* Chat monitoring - Ardamax Keylogger is designed to record and monitor both sides of a conversation in following chats:
o AIM
o Windows Live Messenger 2011
o ICQ 7
o Skype 4
o Yahoo Messenger 10
o Google Talk
o Miranda
o QiP 2010
* Security - allows you to protect program settings, Hidden Mode and Log file.
* Application monitoring - keylogger will record the application that was in use that received the keystroke!
* Time/Date tracking - it allows you to pinpoint the exact time a window received a keystroke!
* Powerful Log Viewer - you can view and save the log as a HTML page or plain text with keylogger Log Viewer.
* Small size – Ardamax Keylogger is several times smaller than other programs with the same features. It has no additional modules and libraries, so its size is smaller and the performance is higher.
* Ardamax Keylogger fully supports Unicode characters which makes it possible to record keystrokes that include characters from Japanese, Chinese, Arabic and many other character sets.
* It records every keystroke. Captures passwords and all other invisible text.
Other Features:
* Windows 2000/2003/XP/Vista/Windows 7 support
* Monitors multi-user machines
* Automatic startup
* Friendly interface
* Easy to install
Enjoy;)
Download: This file is full Ardamax 3.7.2 Keylogger with no activation needed, downloaded from their official site. Just Downlaod and ENJOY ;)
http://www.mediafire.com/?wr9yykc4zhi0dr8
Pass: hackthepc
Rafay Hacking Articles : A Hacking Blog that really know Ethics.

There are countless Blog that offer you teach Hacking, some of them feature Flying Skulls and great Graphics while other offer to teach Ethical Hacking. Well from most of these Ethical Blogs I have found only one blog that really mean what it says:
The BLOG is RHA ( RafayHackingArticles.blogspot.com ) It is one of the best Security Blog in Pakistan and India, with daily visitors of 10k to 14k and thousands of feed subscriptions. This Owner of this Blog Rafay Baloch Launched this blog 2 years ago and have form then achieved a good reputation in Newbies and Pros alike.
The Positive thing of this blog is that it teaches Hacking from very start but in a positive way which promote security instead of Defacing and so training a New Army of White Hat Hackers. This is the Blog that will teach a person about the hacking from the very start, it teaches about Password Hacking, Yahoo, Gmail, Facebook, Orkut and My Space Hacking techniques. This blog make it really easy for a Beginner to understand the basics of the hacking.
But on the other hand main problem with is blog is that it have very less content. I mean it is having more than 200 articles but when you start reading them it all finishes in less than a week, So i would like to see many more articles on this Blog.
The Author of this Blog is also writer of a Famous Hacking Book called:
A Beginners Guide to Ethical Hacking
This book is for the Beginners to Hacking who have just joined the Advanture as Hacker, It will help the reader in the following ways::
- You will learn All Ethical hacking techniques and also you will learn to apply them in real world situation
- You will start to think like hackers
- Secure your computer from trojans,worms, Adwares etc
- Amaze your friends with your newly learned tricks
- You will be able to protect your self from future hack attacks
Another work of the same author is release of the Facebook Hacking Course:
This Course contain Videos Facebook hacking Courseis basically contains series of videos which will tell you exactly how hackers hack facebook accounts, What methods they use and how you can avoid falling for these kinds of attacks.
In this You will learn:
- The exact techiniques which hackers use to hack facebook accounts.
- Security tips to protect your facebook account from getting hacked.
- Protecting your Privacy
To participate this course Visit ::: http://www.facebookhackingcourse.com/
How to Send Fake Emails ? 100% Working Way !!!
I have got to now about the following site which can sent Fake emails to any email hosting and it is not detected by any email service as SPAM.
The Site is
http://emkei.cz/
The Site is
http://emkei.cz/
Tag :
Fake email
How to Hack any PTCL Broadband user in Pakistan ?

The Hack goes like this that all the Routers have 3 ports open. Two of them are :
- Port 23 : Telnet Server Port.
- Port 80 : Http Server Port.
STEP 1: Finding the IP address.
Well this could be difficult. But there are two ways:
- First is to check your Public IP Address at http://whatismyipaddress.com/ and than scan the nearby IP addresses. e.g. If my IP address is 182.177.252.166 than I would scan from 182.177.252.1 to 182.177.252.250 . Because we connect the internet with Dynamic IP addresses it means that nearby IP address would also be PTCL Broadband users.
- The other way can be to run netstat -an command in command prompt to see the IP address of people whom you are chatting.
STEP 2: Connecting to Telnet or Http Server.
Connecting to Telnet server: Well now when we have the IP address just goto start => RUN then type cmd.exe in it. and following screen will appear . Then type followin into it telnet {IP ADDRESS}.

NOW THIS SCREEN WILL APPEAR:

NOTE::::::::::::::::::::::::::::::::::
The Default Username is: admin
The Default Password is: admin
or
Username is : user
Password is : user
::::::::::::::::::::::::::::::::::::::::::::::::::::::::::::::::::::::::::::::::::
Now after you have given the user name and Password following screen will appear . Type "help" in it to get all the commands and to whatever with it. BUT BE IN LIMITS!!!!
screen shot of hacked router:

Connecting to Http server: Well all the steps are same but this time you use your browser to access the router like show below.
NOTE::::::::::::::::::::::::::::::::::
The Default Username is: admin
The Default Password is: admin

and after that:

Disclaim:----------------------------------------------------------------------
I take no responsibility of any stupid thing did by any one of you with this information. I just showed you how to do it. Best way of testing it is to hack your self like i Did in this tutorial.
How to find Templates Name of a Blog in Wordpress ?
Well here I am to tell you the best way to find the name of Template in Wordpress. Just follow the following steps:
1: Goto the BLOG. in this case it is I am using www.gohacking.com because I like their template. Now goto Page source as shown below:

2: Now the following page will open:

3: now scroll down and find the following lines in which the Highlighted words are the name of template:

NOW AS YOU CAN SEE THE NAME OF THE TEMPLATE IS "ARTEMIA PREMIUM". NOW YOU CAN SEARCH IN GOOGLE FOR THAT..
HOPE YOU LIKE IT!!!!!
1: Goto the BLOG. in this case it is I am using www.gohacking.com because I like their template. Now goto Page source as shown below:

2: Now the following page will open:

3: now scroll down and find the following lines in which the Highlighted words are the name of template:

NOW AS YOU CAN SEE THE NAME OF THE TEMPLATE IS "ARTEMIA PREMIUM". NOW YOU CAN SEARCH IN GOOGLE FOR THAT..
HOPE YOU LIKE IT!!!!!
Tag :
Internet Tricks
How to find Templates Name of a Blog in Blogger ?
Well I have most often seen bloggers removing the footbar of blog to hide the name of the templates. So i have found a way to know the name of template. Note it is not 100% effective but work in nearly all cases. e.g till now i have found no blog whoes template name i cannot Know.
1: SO first step is to open the blog's address. in this case I am doing it with myself.
2: Now Right click on the page and click view page source.

3: Now the source of the Blog will appear like this:

4: Now Scroll down to find the text like below:

NOW YOU CAN CLEARLY SEE THE TEXT WHICH TELLS THE NAME OF THE TEMPLATE , IT'S AUTHOR AND WEBSITE.
Hope you enjoyed!!!!
1: SO first step is to open the blog's address. in this case I am doing it with myself.
2: Now Right click on the page and click view page source.

3: Now the source of the Blog will appear like this:

4: Now Scroll down to find the text like below:

NOW YOU CAN CLEARLY SEE THE TEXT WHICH TELLS THE NAME OF THE TEMPLATE , IT'S AUTHOR AND WEBSITE.
Hope you enjoyed!!!!
Tag :
Internet Tricks


